Customer
Guidelines

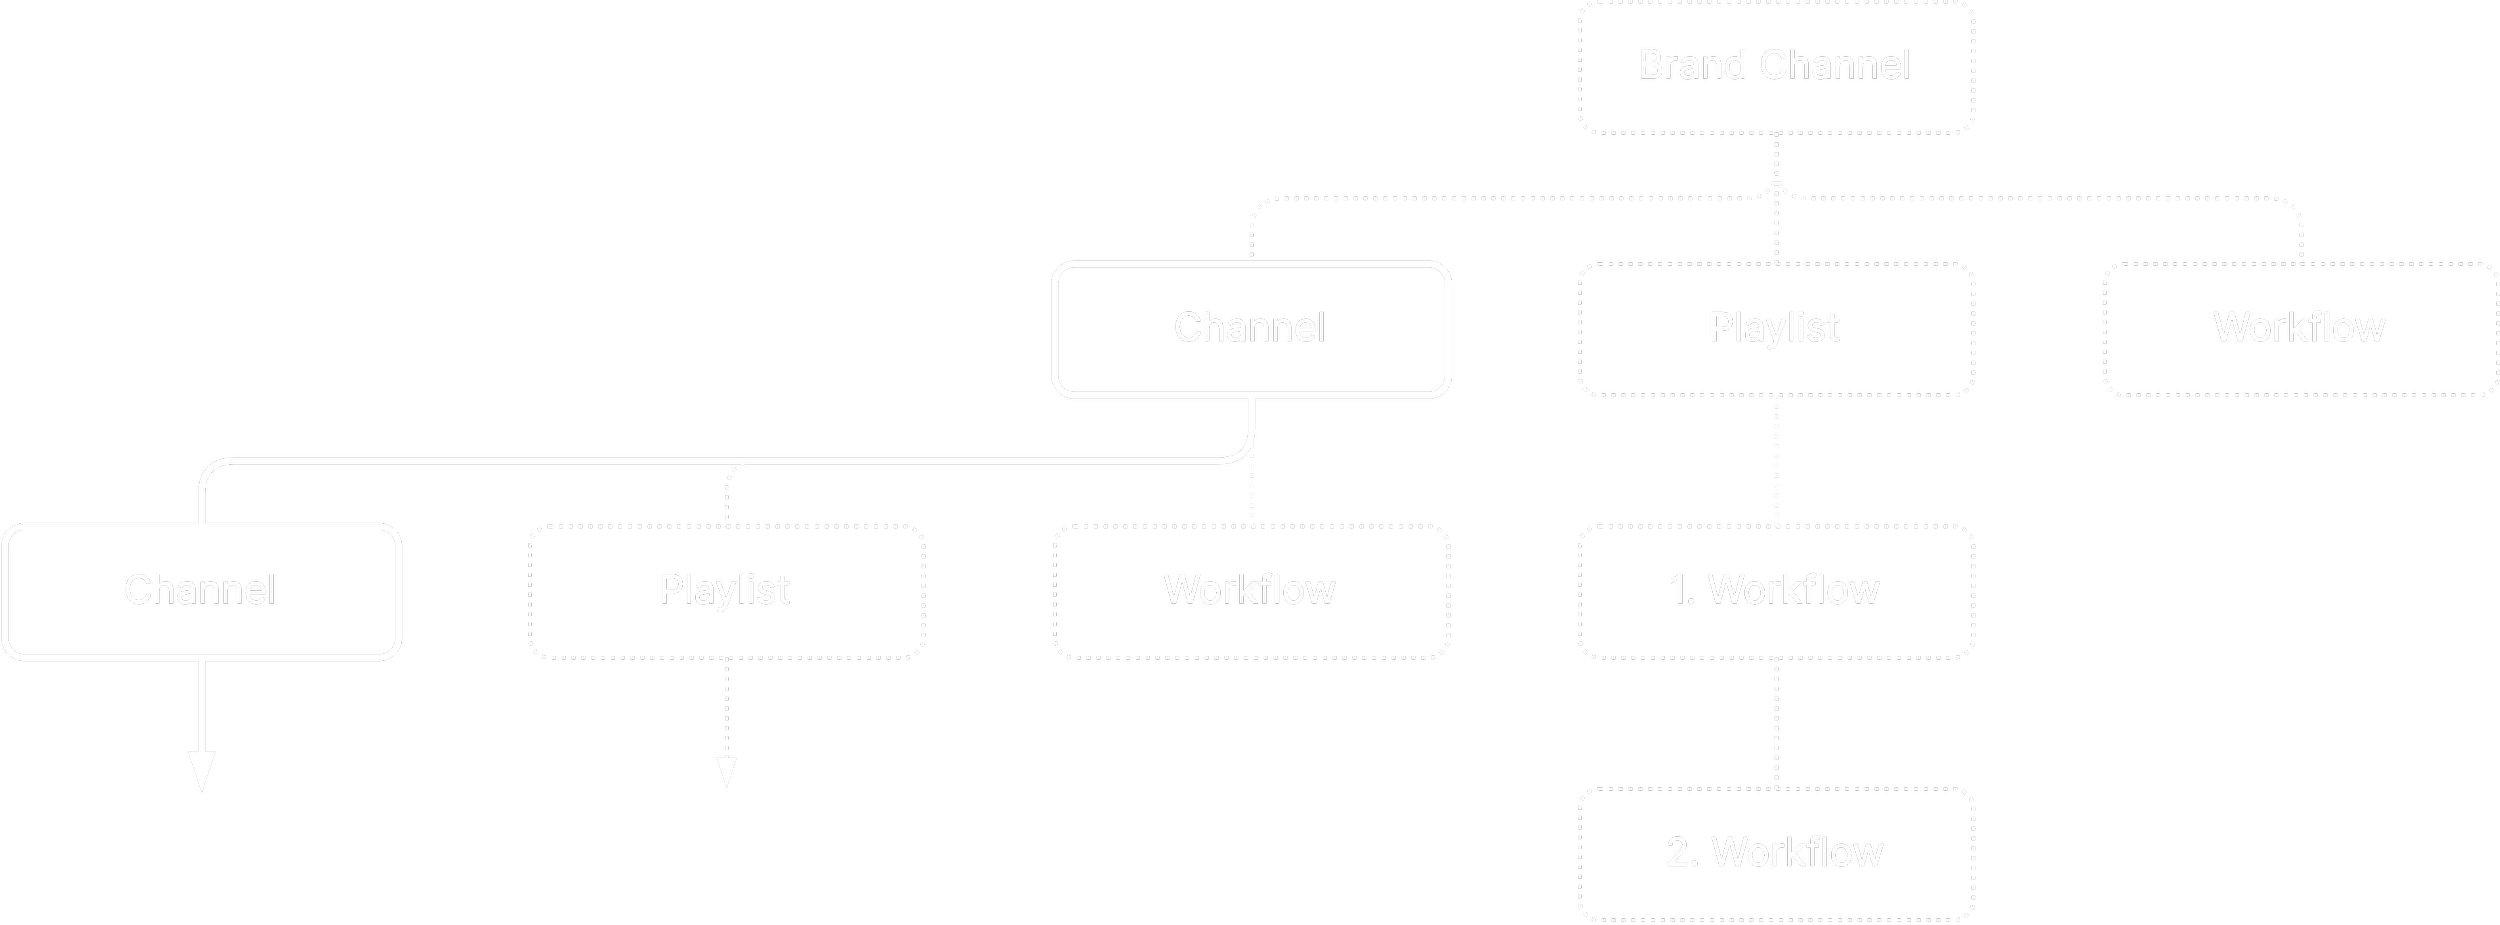
Set up your Brand, build your Channels and organize your Workflows
Learn about

Brands > Channels > Playlists > Workflows >
Here you find all information about content and identity management with craftguide for your brand and content channels. This is a step by step instruction for the customer and describes information and content you can use. Tipps and best practices are also included.
1. Setup your Brand
Your Brand Channel is your space to display product or topic related Channels, Playlists and Workflows.

Channel Icon
Recommended size: 800 x 800 px
Recommended background: white
Choose “Channels” in the menu. Klick on “Edit”. Your Brand Channel is marked with blue outline.
Upload your logo (JPEG, PNG, WebP).
Upload a Channel Banner if liked. Channel Banners are displayed on the craftguide web platform above your logo.
Name your Brand Channel (current language is displayed).
Describe your brand (current language is displayed).
Add your website to attract users to your brand.
Add your contact link to help users to reach your support.
Set your Brand Channel to “public” if you like to be visible for unregistered users. By choosing “public” your brand is visible on the craftguide search and all content on this level can be accessed by everyone.
Save your changes to the Brand Channel.

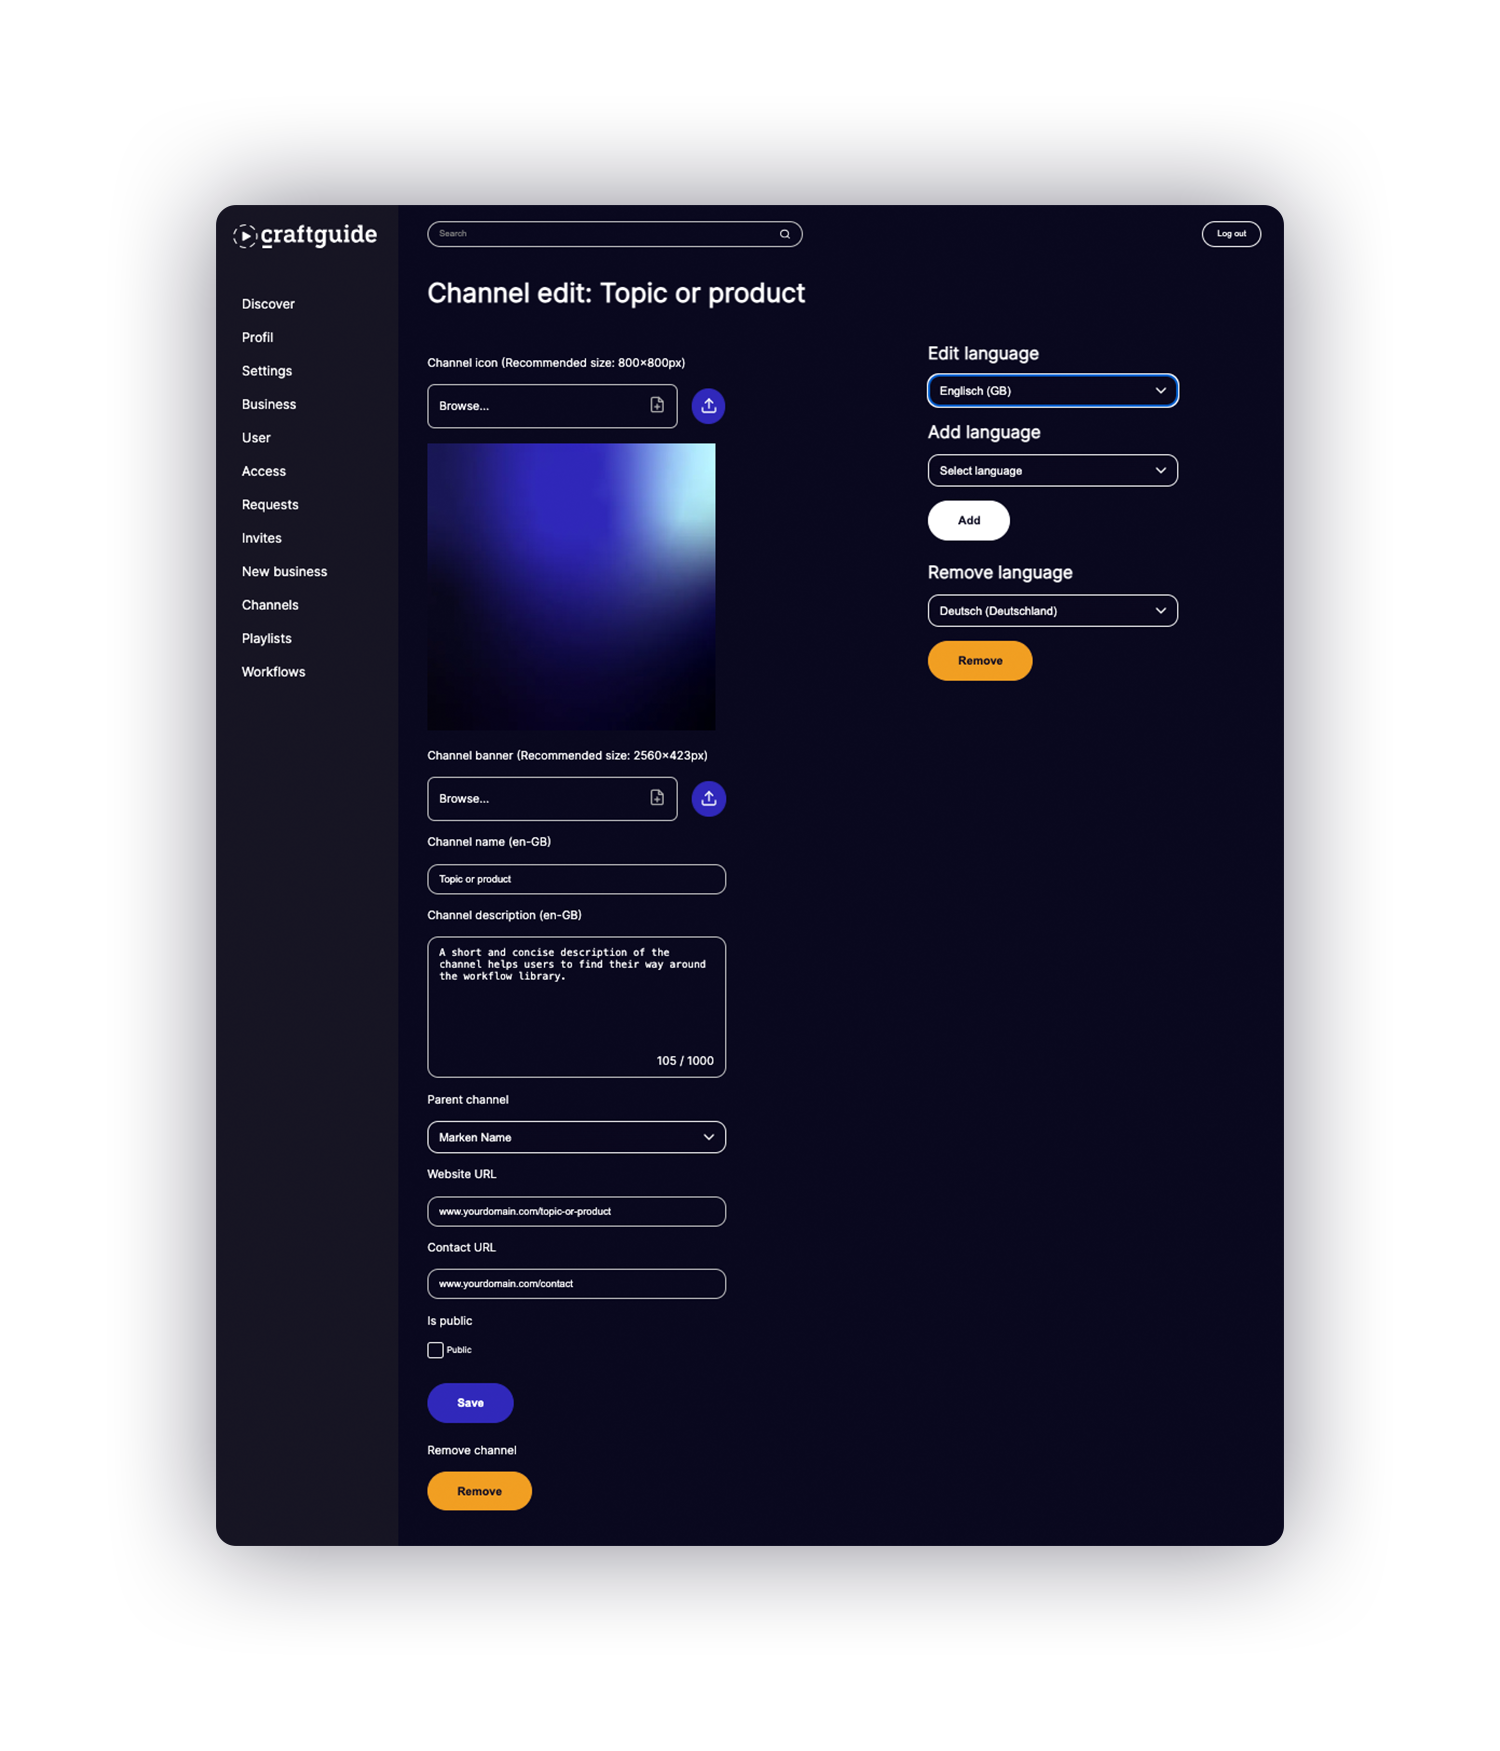
Add languages to your Brand
Add translations to your Brand Channel by selecting the desired one in the “Add language” dropdown and klick “Add”. You can now choose between languages in the “Edit language” dropdown.
Add languages.
Choose the language you want to edit.
Add Channel name and channel description to your language (current language is displayed).
Save your changes to the Brand Channel.
2. Build your Channels
Channels can contain other Channels, Playlists and Workflows. They help to structure the content as you need it and guide the user trough your library. Channels are typically organized into topics or products. This makes it easy for users to find your workflows. To achieve a deeper information architecture, several levels of channels can be set up.
Channel Icon
Recommended size: 800 x 800 px
Recommended style: clear images that show your topic or product
Choose “Channels” in the menu. Klick on “New Channel” to setup a Channel inside your brands space.
Upload a Channel Icon (JPEG, PNG, WebP).
Upload a Channel Banner if liked. Channel Banners are displayed on the craftguide web platform above Channel.
Name your Channel (current language is displayed).
Describe your Channel (current language is displayed).
Add a link to funnel users to your website.
Add your contact link to help users to reach your support.
Set your Channel to “public” if you like to be visible for unregistered users. By choosing “public” your brand is visible on the craftguide search and all content on this level can be accessed by everyone.
Save your changes to the Channel.
Add languages to your Channel
Add translations to your Channel by selecting the desired one in the “Add language” dropdown and klick “Add”. You can now choose between languages in the “Edit language” dropdown.
Add languages.
Choose the language you want to edit.
Add Channel name and Channel description to your language (current language is displayed).
Save your changes to the Channel.
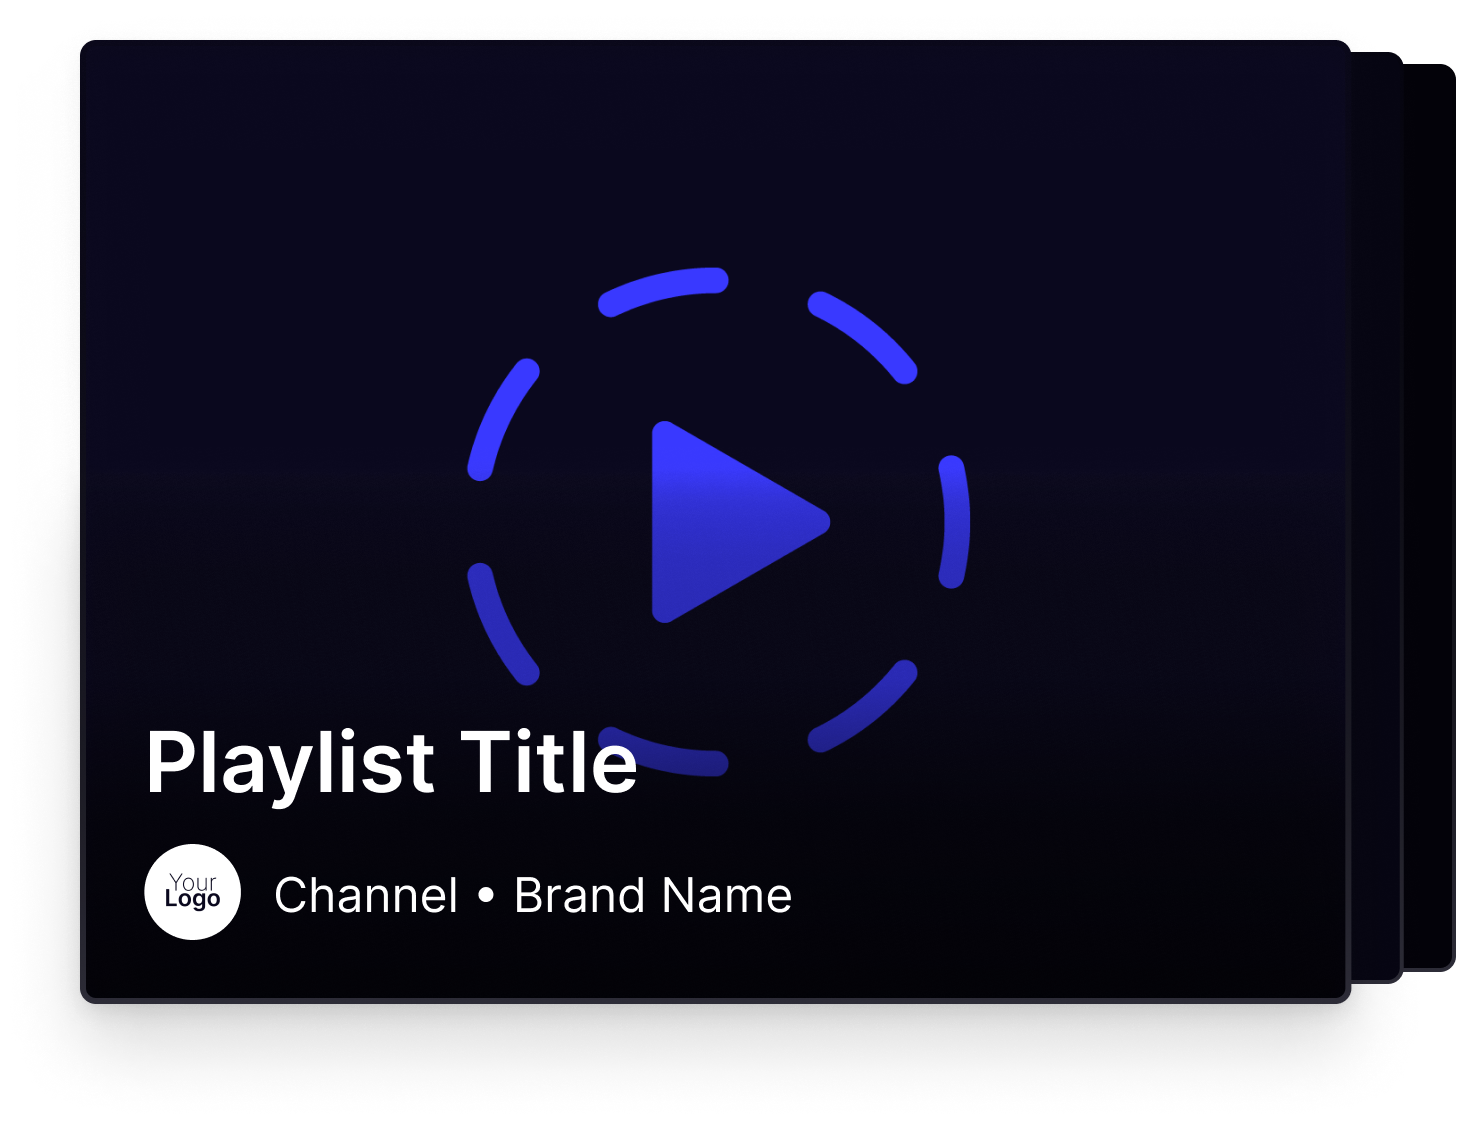
3. Create Playlists
Playlists feature several workflows and play them in the selected order. At the end of each workflow, the next workflow is displayed for continuation and users can jump between workflows within the playlist at any time. Playlists can also be embedded in other websites and web-based tools via embed links.
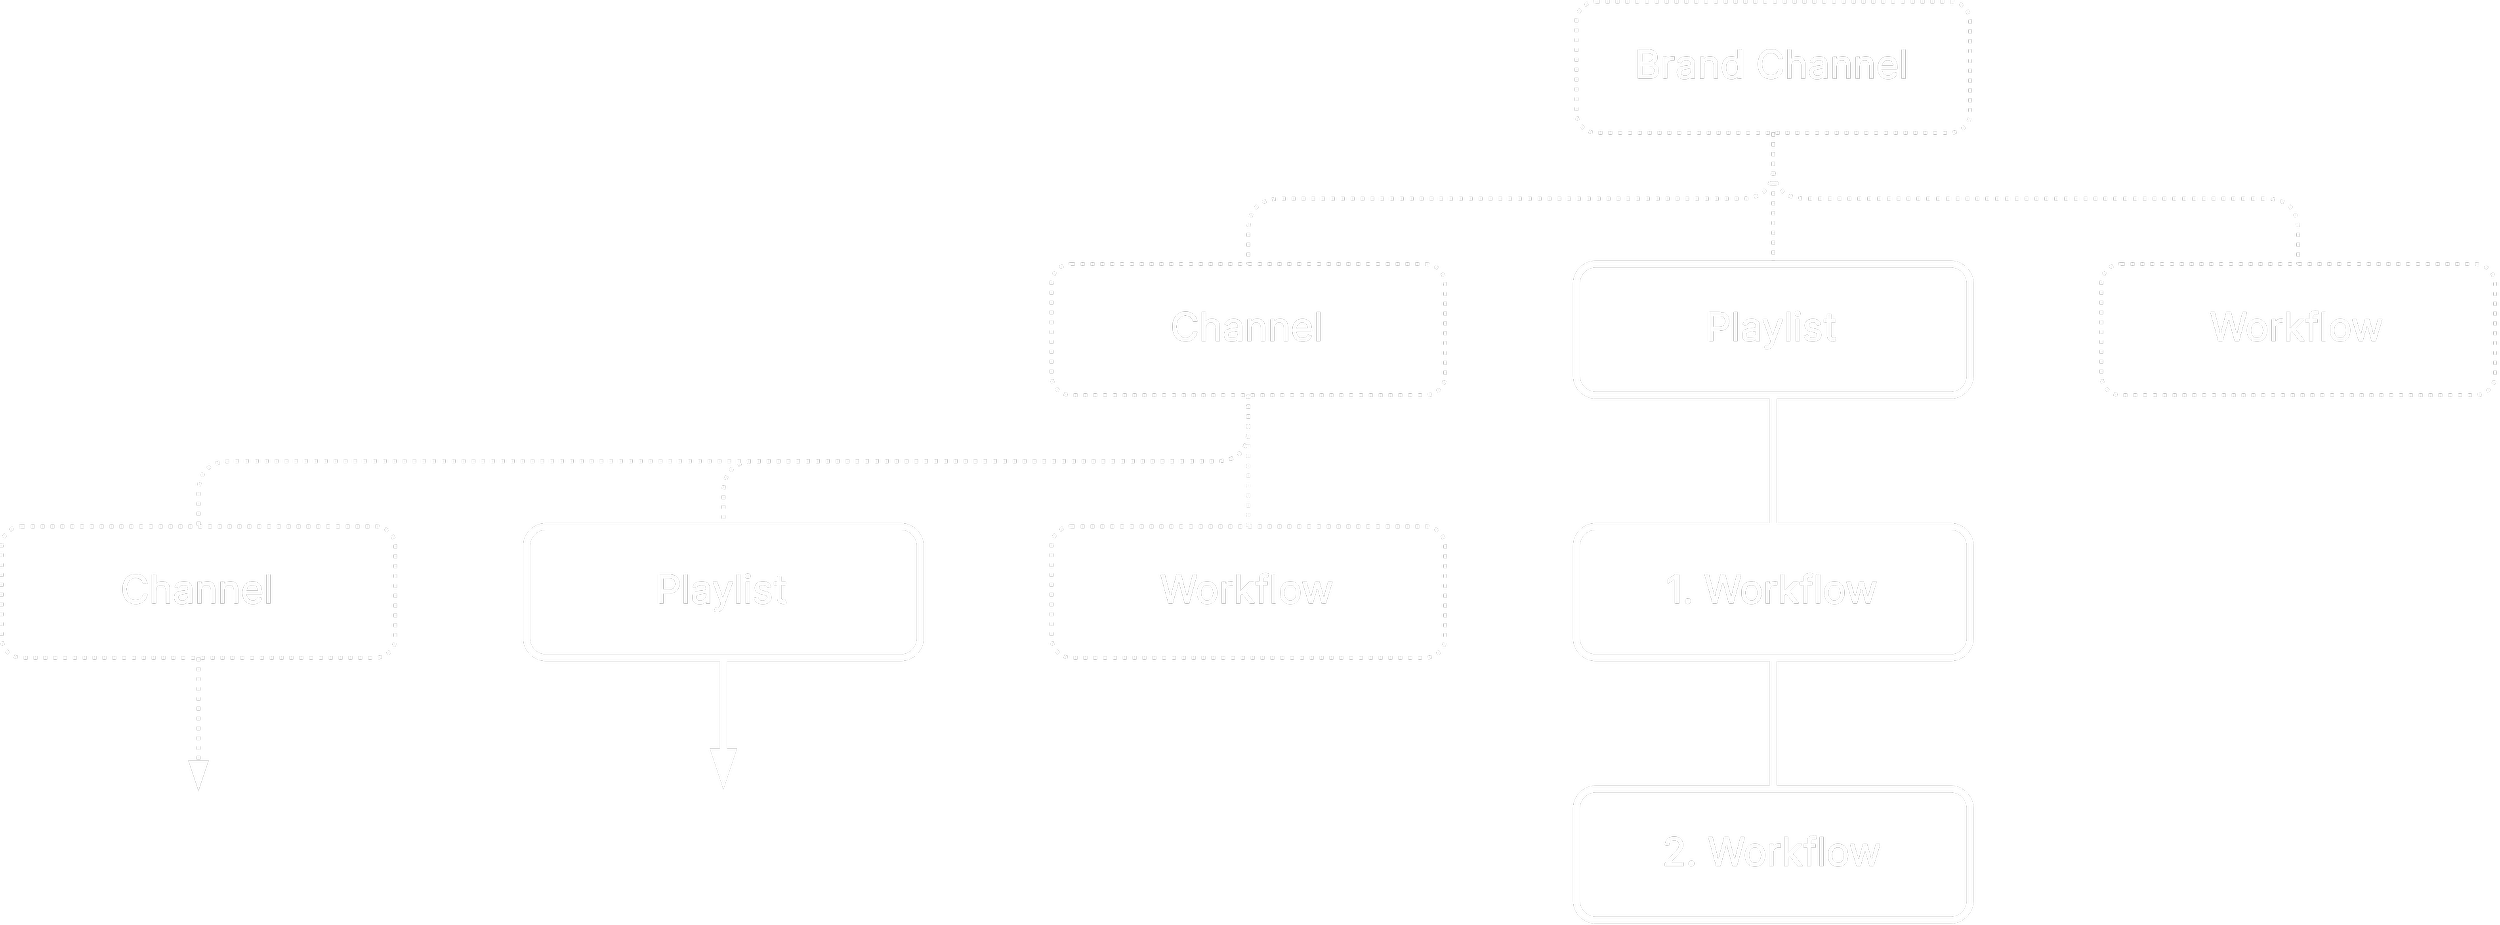
Playlist preview
is generated from the Workflows in the Playlist
Choose “Playlists” in the menu. Klick on “New Playlist” to create a Playlist inside a Channel.
Name your Playlist (current language is displayed).
Select the channel in which you want your playlist to appear in the dropdown.
Klick “Save” to setup the Playlist.
Now you can add workflows to the playlist using the "+" button.
Enter a search term or click on "Search" without entering anything to add workflows. Close the pop-up window when you are ready.
Arrange the workflows in the list using drag and drop to set the desired order.
Save your changes to the Playlist.

Add languages to your Playlist
Add translations to your Playlist by selecting the desired one in the “Add language” dropdown and klick “Add”. You can now choose between languages in the “Edit language” dropdown.
Add languages.
Choose the language you want to edit.
Add Playlist name to your language (current language is displayed).
Save your changes to the Playlist.
Embed your Playlist
You can embed your Playlist via Javascript and Iframe to any website or web based software. In addition, a link is generated that can be used to access the playlist without embedding it.
Klick “?” to get a full embedding documentation and the code needed to embed.
Copy the Playlist link to share it.
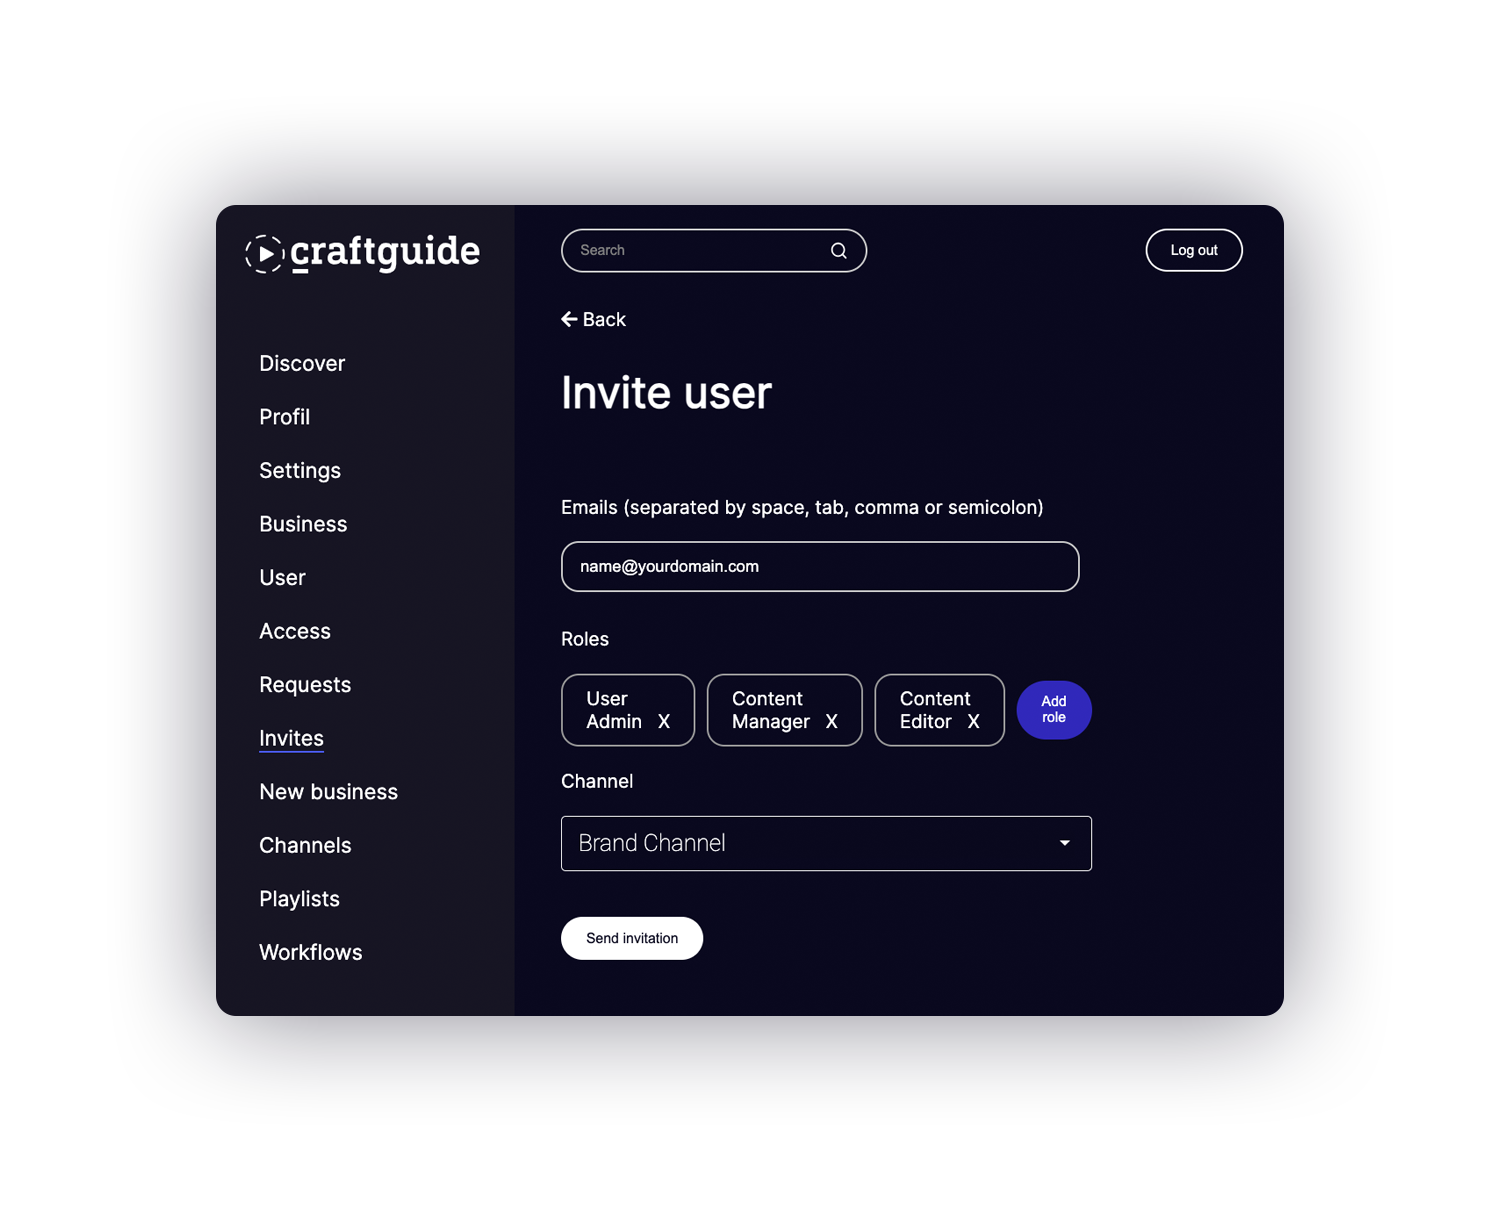
Invite Users
Invite users to your channel to give them access to content on your channel that is not "public", or to build and manage your content library.
Choose “Invites” in the menu. Klick on “New Invite” to add users to your Channel.
Enter the email of the user you want to invite. You can also invite multiple users at a time (for this, just separate the emails by space, tab, comma or semicolon).
Add the desired roles.
Select the Channel. Roles will be applied for everything that is inside the selected Channel.
Send invitation.
The invited user will now receive an e-mail to complete the setup of their account.
Once the account has been confirmed, the user will appear in your user administration.